W ostatnich latach ruch twórców zyskał ogromną popularność na całym świecie, a Chiny stały się kluczowym graczem w tej dziedzinie. Dla hobbystów i entuzjastów majsterkowania stworzenie maszyny typu pick and place może być ekscytującym projektem. Niniejszy artykuł zawiera szczegółowy przewodnik po budowie własnej maszyny typu pick and place w Chinach, łącząc zarówno wiedzę techniczną, jak i praktyczne porady, które pomogą ci odnieść sukces w tym przedsięwzięciu.
Co to jest maszyna Pick and Place?
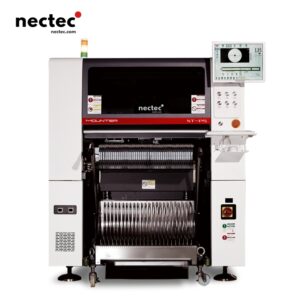
Maszyna typu pick and place jest niezbędnym elementem wyposażenia powszechnie stosowanym w produkcji elektroniki. Jego podstawową funkcją jest automatyczne umieszczanie komponentów na płytce drukowanej, zwiększając wydajność i dokładność przy jednoczesnym minimalizowaniu błędów ludzkich. Dla entuzjastów majsterkowania skonstruowanie takiego urządzenia pozwala na zdobycie praktycznego doświadczenia w zakresie systemów robotycznych, elektroniki i projektowania mechanicznego.
Wybór odpowiednich komponentów
Budowa maszyny typu pick and place wymaga starannego doboru komponentów. Oto najważniejsze części, których będziesz potrzebować:
- Ramka: Do wykonania ramy można użyć profili aluminiowych lub drewna. Upewnij się, że jest solidna i stabilna.
- Silniki: Silniki krokowe są najczęściej wybierane do precyzyjnych ruchów. Silniki NEMA 17 lub NEMA 23 zapewniają wystarczający moment obrotowy.
- Płyta kontrolera: Wybierz kompatybilny kontroler, taki jak Arduino lub Raspberry Pi, który może obsługiwać sterowanie ruchem.
- Przyssawki lub chwytaki: W zależności od projektu należy wybrać odpowiednie przyssawki lub mechanizm chwytający do obsługi komponentów.
- Kamery i czujniki: Systemy wizyjne pomagają w identyfikacji komponentów i zapewnieniu ich właściwego rozmieszczenia.
- Zasilanie: Upewnij się, że masz niezawodny zasilacz, który poradzi sobie z wymaganiami silnika i sterownika.
Projektowanie maszyny Pick and Place
Przed złożeniem maszyny należy ją zaprojektować. Wykorzystaj oprogramowanie takie jak Fusion 360 lub SolidWorks do modelowania 3D. Zwróć uwagę na następujące aspekty:
- Rozmiar: Określ maksymalny rozmiar płytki drukowanej, z którą planujesz pracować i odpowiednio zaprojektuj.
- Axis Movement: Większość maszyn wykorzystuje kartezjański układ współrzędnych. Zaplanuj osie X, Y i Z dla prawidłowego ruchu głowicy pick and place.
- Funkcje wyrównania: Upewnij się, że dołączono elementy umożliwiające precyzyjne wyrównanie, takie jak punkty znakowania lub prowadnice.
Montaż urządzenia
Gdy masz już wszystkie komponenty i projekt, nadszedł czas na montaż:
- Konstrukcja ramy: Zacznij od zbudowania ramy zgodnie z projektem. Upewnij się, że wszystko jest prostopadłe i wyrównane.
- Instalacja silnika: Zamontuj bezpiecznie silniki krokowe w wyznaczonych pozycjach.
- Okablowanie: Ostrożnie podłącz silniki i zasilanie do płytki kontrolera, postępując zgodnie ze schematami obwodów, aby uniknąć błędów.
- Umieszczanie głowicy Pick and Place: Przymocuj przyssawkę lub chwytak do głowicy pick and place, upewniając się, że ma odpowiedni zakres ruchu.
- Dodawanie czujników/kamer: Zainstaluj kamery i wszelkie niezbędne czujniki, aby pomóc w wykrywaniu i wyrównywaniu komponentów.
Programowanie maszyny Pick and Place
Po zakończeniu fizycznego montażu, kolejnym kluczowym krokiem jest programowanie. Wykorzystaj języki programowania, takie jak Python lub C++, aby komunikować się ze sterownikiem:
- Kontrola ruchu: Napisz kod dla ruchu silników w sposób, który dokładnie pozycjonuje głowicę pick and place.
- Rozpoznawanie komponentów: Integracja systemu wizyjnego do identyfikacji i lokalizacji komponentów na płytce drukowanej.
- Logika umieszczania: Opracowanie logiki dla sekwencji ruchów - skąd pobierać komponenty i gdzie umieszczać je na płytce drukowanej.
Testowanie i dostrajanie
Po zaprogramowaniu nadszedł czas na testy. Zacznij od kilku prostych uruchomień:
- Uruchom diagnostykę poszczególnych komponentów, aby upewnić się, że wszystkie silniki i czujniki działają prawidłowo.
- Przeprowadzenie próbnych uruchomień w celu obserwacji ruchów maszyny bez komponentów i sprawdzenia, czy wszystko działa zgodnie z przeznaczeniem.
- Gdy będziesz mieć pewność, spróbuj umieścić rzeczywiste komponenty na testowej płytce drukowanej.
- Precyzyjne dostrojenie programowania i komponentów mechanicznych w celu zwiększenia dokładności i wydajności.
Rozszerzenie projektu DIY
Po pomyślnym zbudowaniu i przetestowaniu maszyny typu pick and place, warto rozważyć rozszerzenie jej funkcjonalności:
- Personalizacja: Eksperymentuj z różnymi konstrukcjami chwytaków lub mechanizmów ssących dostosowanych do konkretnych komponentów.
- Integracja sztucznej inteligencji: Zbadaj integrację algorytmów uczenia maszynowego w celu poprawy rozpoznawania komponentów i wydajności rozmieszczania.
- Budowanie większego systemu: Skaluj swój projekt, aby obsługiwać bardziej złożone PCB lub większą produkcję seryjną.
Zasoby i wsparcie
Podczas realizacji tego projektu w społeczności twórców dostępnych jest wiele zasobów. Fora internetowe, lokalne przestrzenie dla twórców i samouczki YouTube mogą zapewnić wgląd i pomoc w rozwiązywaniu problemów. Strony internetowe takie jak Instructables i Hackster.io oferują szczegółowe przewodniki i podziały projektów, wspierając kreatywność i innowacyjność.
Przemyślenia końcowe
Łącząc kreatywność z umiejętnościami technicznymi, budowa maszyny typu pick and place w Chinach nie tylko poprawia zrozumienie robotyki i elektroniki, ale może również utorować drogę do dalszych projektów w dziedzinie produkcji elektroniki. Podejmij wyzwania i ciesz się procesem ożywiania swojej maszyny!