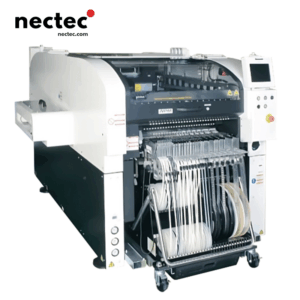
If you’re into electronics and circuit board assembly, a manual SMD (Surface Mount Device) pick and place machine can greatly enhance your production efficiency. This machine allows for precise placement of SMD components which is essential for modern electronics manufacturing. In this guide, we’ll go through the steps to build your very own DIY manual SMD pick and place machine, including essential tools, materials needed, and step-by-step directions. Whether you’re a hobbyist or a professional looking to scale up your assembly process, this DIY project is perfect for you.
Apa yang dimaksud dengan Mesin Pilih dan Tempatkan SMD?
A pick and place machine is a device used in the manufacturing of PCBs that automatically places electronic components onto a PCB. While automated machines are available, they can be expensive and may not be suitable for smaller-scale projects or hobbyists. A manual pick and place machine allows you to achieve precision on a smaller budget.
Why Build a DIY Manual SMD Pick and Place Machine?
Building your own SMD pick and place machine offers several benefits:
- Hemat Biaya: DIY projects are usually less expensive than purchasing a pre-made machine.
- Kustomisasi: You can tailor the design to meet your specific needs.
- Pengalaman Belajar: The process of building the machine allows you to gain in-depth knowledge of SMD technology.
- Fun and Satisfaction: There’s great satisfaction in creating something from scratch.
Materials and Tools Required
Before you begin, gather the following materials and tools:
- Bahan:
- A base plate (preferably aluminum or metal)
- Linear rail system for movement
- Stepper motors (2-4 depending on your design)
- Timing belts and pulleys
- Control board (Arduino or similar)
- Pompa vakum dan cangkir hisap
- Soldering materials and wires
- Catu daya
- Plexiglass for the cover (optional)
- Alat:
- Besi solder
- 3D printer (optional for custom parts)
- Bor dan mata bor
- Kunci pas dan obeng
- Calipers and rulers for measurements
- Digital multimeter for testing
Panduan Langkah-demi-Langkah untuk Membangun Mesin Pilih dan Tempatkan SMD Anda
Step 1: Designing the Machine
The first step is to sketch a design of your pick and place machine. Decide on the dimensions based on the size of the PCBs you plan to work with. Take into account the space needed for components and any operational features you want to include.
Step 2: Assembling the Base
Start by assembling the base plate which serves as the foundation of your machine. Attach the linear rails that will allow the pickup head to move on the X and Y axes. Ensure that the base is sturdy and stable for precise movements.
Step 3: Installing Stepper Motors
Attach the stepper motors to the machine, ensuring they are securely mounted. Connect them to the linear rail system using the timing belts and pulleys to create the movement mechanism. Ensure all connections are tight to avoid any slip-ups during operation.
Step 4: Electronics Setup
Set up your control board, like an Arduino, and connect it to the stepper motors. This will allow you to control the movement of the pick and place arm. Write or download a basic program that integrates with your hardware to control movements effectively.
Step 5: Building the Pickup Head
This is where the magic happens. Create a suction head using vacuum suction cups connected to a vacuum pump. This head will pick up the SMD components and place them accurately on the PCB. Make sure that your suction cups are of appropriate size for the components you’ll be placing.
Step 6: Testing Your Machine
Before you start working with actual components, run tests. Ensure that the machine can move accurately to the designated spots on your PCB. Make adjustments as necessary, fine-tuning the movements for increased precision.
Langkah 7: Kalibrasi
Calibrating your machine is crucial to achieving accurate placements. Mark reference points on your PCB and ensure that the movable parts are aligned correctly. Calibration might take some time, but it pays off in successful assembly.
Regular Maintenance for Optimal Performance
Once your DIY SMD pick and place machine is operational, regular maintenance is essential to ensure it performs optimally. Lubricate moving parts as necessary and check electrical connections periodically. It may also be beneficial to clean the suction cups to prevent dust build-up that could affect performance.
Possible Enhancements
Once you’re comfortable with your basic build, consider enhancements. For instance, you can integrate a camera for vision-guided placement, or upgrade to an automated system for faster throughput. You could also implement a touch screen interface for easier navigation and control.
Memecahkan Masalah Umum
During operation, you might encounter some issues such as components not being picked up correctly or misplacements. Common causes include:
- Insufficient vacuum pressure: Ensure your vacuum pump is functioning efficiently.
- Misalignment during assembly: Regularly check and realign components.
- Software issues: Verify that your program is error-free and compatible with your hardware.
Pikiran Akhir
Building a DIY manual SMD pick and place machine is not only a rewarding experience but also a critical step in elevating your electronics assembly capabilities. By following this guide, you should be well-equipped to create a machine that meets your specific needs, unlocks new project possibilities, and enhances your skillset in electronics.
With this machine, you will be able to produce high-quality PCBs tailored for various electronics projects, from small hobby designs to more complex applications. Embrace the challenge and enjoy the journey of creating your very own SMD pick and place machine!


